If you’re wondering how to store coffee grounds in a disposal bin, here’s a quick summary of the step-by-step guide. First, make sure your disposal bin is clean and dry. Next, transfer the coffee grounds into an airtight container or resealable bag. Label the container with the date of when the coffee grounds were stored. Place the container in the disposal bin and make sure it is tightly sealed. Store the bin in a cool, dark place away from moisture and heat sources. Finally, remember to regularly clean and check the disposal bin for any signs of mold or unpleasant odors. With these simple steps, you can keep your coffee grounds fresh for longer and enjoy a delicious cup of coffee every time!
Table of Contents
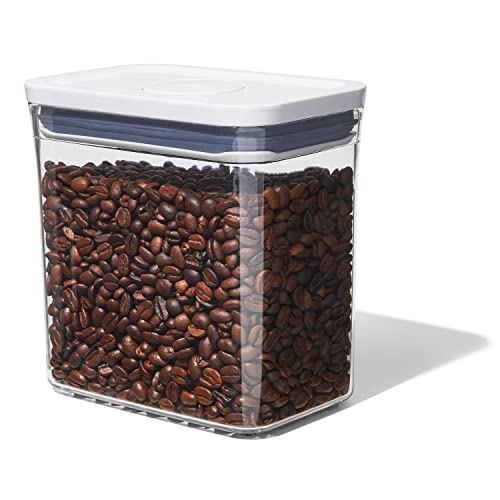
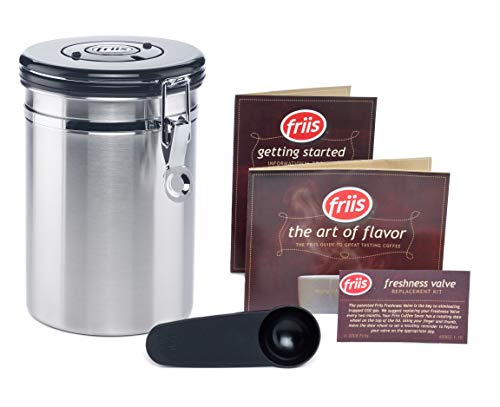
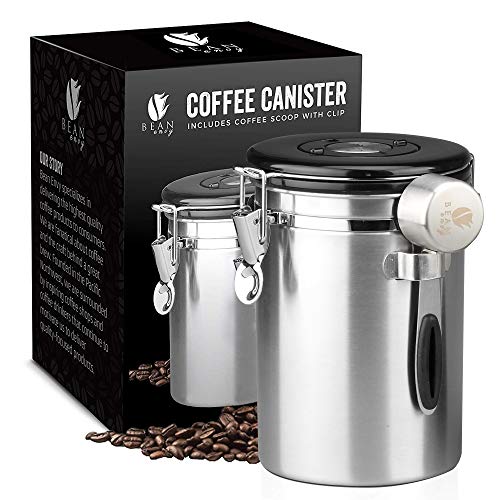
Top Picks for Coffee Grounds Containers!


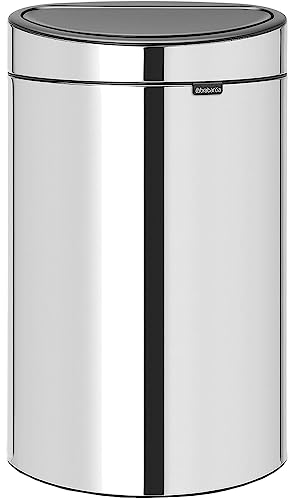
Choose a suitable disposal bin
When choosing a suitable disposal bin for your coffee grounds, it is important to opt for one that is airtight and made of a material that won’t absorb odors. Look for bins made from stainless steel or ceramic, as these materials are known for their odor-resistant properties. Airtight bins ensure that no unpleasant smells escape, keeping your kitchen fresh and clean. Additionally, make sure the bin has a secure lid that fits tightly to further seal and protect the coffee grounds.
To select the right disposal bin, consider its size and design. Determine the amount of coffee you typically brew and choose a bin that can accommodate that volume without overflowing. Look for bins with a wide opening for easy disposal and cleaning. Remember to check for any additional features, such as handles or foot pedals, which can make it easier to use and transport the bin. By choosing a bin that is airtight, made of odor-resistant materials, and equipped with a secure lid, you can ensure your coffee grounds are properly contained and protected.


Prepare the bin
To clean the disposal bin thoroughly, start by filling a sink or tub with warm soapy water. Add a few drops of dish soap to the water and mix it well. Place the bin in the soapy water and use a sponge or cloth to scrub both the inside and outside of the bin. Make sure to pay extra attention to any stubborn stains or sticky residue.
Once you have thoroughly scrubbed the bin, rinse it well with clean water to remove any soap residue. You can either rinse it under running water or fill the sink or tub with clean water and submerge the bin again. Make sure to rinse all areas, including the lid and any crevices.
After rinsing, inspect the bin to ensure that there are no residues or odors left from previous use. If you notice any lingering smells, you can use a mixture of baking soda and water to neutralize the odor. Simply sprinkle baking soda inside the bin and let it sit for a few minutes before rinsing again.
Once the bin is clean and odor-free, it’s important to dry it completely before moving on to the next step. Use a clean towel or leave it in a well-ventilated area to air dry. Avoid putting the lid back on until the bin is completely dry to prevent any moisture buildup that could lead to unpleasant odors.
By following these steps and ensuring that your disposal bin is clean and dry, you can have a fresh and sanitary bin ready for use.

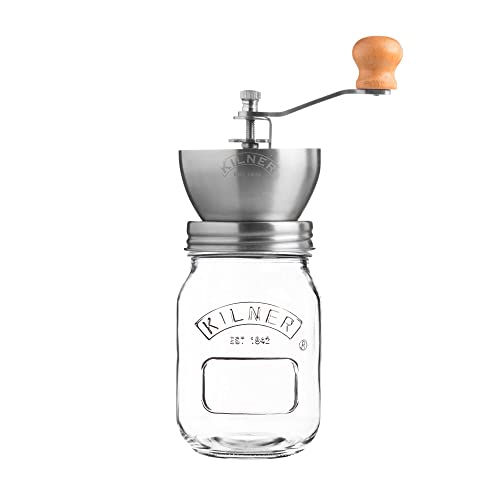

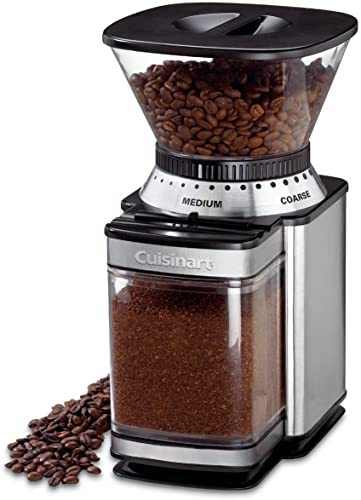
Grind and measure the coffee
Grinding your coffee beans to the desired consistency is crucial for achieving the perfect cup of coffee. First, ensure that you have a good quality burr grinder. This will give you more control over the grind size. If you prefer a coarse grind for your French press, set the grinder accordingly. If you’re aiming for a fine grind for an espresso, adjust it accordingly as well. Experiment with different grind sizes to find the one that suits your taste best.
Once you have ground your coffee beans, it’s time to measure the appropriate amount of coffee grounds. The ideal ratio is generally one to two tablespoons of coffee per six ounces of water. However, feel free to adjust this based on your personal preference. If you like a stronger cup, you can increase the amount of coffee grounds. If you prefer a milder taste, you can decrease it. Remember, the key is to find the right balance that satisfies your taste buds.
For example, if you have a 12-ounce mug and prefer a medium-strength brew, start by measuring two tablespoons of coffee grounds. If you want it stronger, add an extra half tablespoon. If you find it too strong, reduce the amount slightly. By experimenting with different measurements, you’ll be able to find your perfect cup of coffee. Just remember to grind and measure the coffee just before storing it to maintain its freshness.


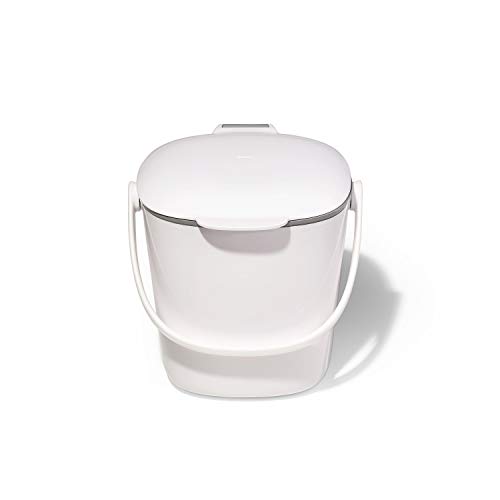
Transfer the coffee grounds
To transfer the coffee grounds into the prepared disposal bin, start by ensuring that you have a funnel or a spoon handy. Hold the funnel over the bin or use the spoon to carefully pour or scoop the coffee grounds into the bin. This will help you avoid any spills or wastage, keeping your workspace clean and efficient. Remember, the goal is to transfer all of the coffee grounds without leaving any behind.
While transferring the coffee grounds, be mindful not to overfill the bin. Leave some space for air circulation to prevent any unpleasant odors or potential mold growth. Aim to fill the bin to a level where it is not completely full, but still has enough room for the coffee grounds to settle comfortably. By following these simple instructions and taking care with the transfer process, you can ensure that none of the precious coffee grounds go to waste and that your disposal bin remains in optimal condition.


Seal and store the bin
Place the lid securely on the disposal bin, ensuring a tight seal. Before storing your bin, make sure to attach the lid firmly to the top of the container. Press down on all sides to create a tight seal. This will help prevent any unwanted odors or leaks from escaping. Double-check that the lid is properly aligned with the edges of the bin to ensure a secure fit. A snug seal will also help keep pests out, ensuring the contents remain undisturbed.
Store the bin in a cool, dry, and dark place, away from direct sunlight or heat sources. Find an appropriate location to store your disposal bin. Ideally, this should be a cool, dry, and dark area within your home. Avoid placing the bin in direct sunlight or near any heat sources, such as radiators or stoves. Excessive heat can accelerate the decomposition process and cause foul odors. Store the bin in a spot where the temperature remains relatively constant, as fluctuations can also affect the contents. A cool, dry, and dark environment will help maintain the integrity of the bin and its contents.
Avoid storing the bin near strong-smelling substances to prevent flavor contamination. To ensure the purity of the materials in your disposal bin, it is important to keep it away from strong-smelling substances. Strong odors can permeate the bin and potentially contaminate the contents, altering their flavor and quality. Store the bin in a location where it is unlikely to come into contact with items such as cleaning chemicals, perfumes, or pungent foods. By keeping the bin away from these strong-smelling substances, you can preserve the integrity and freshness of the materials inside.


Wrap it up and store!
In conclusion, storing your coffee grounds in a disposal bin is a simple process that can ensure freshness and eliminate odors. By selecting the right bin, preparing it correctly, transferring the grounds carefully, and storing it in the appropriate conditions, you can enjoy a consistently great cup of coffee. So go ahead, follow these steps, and savor the taste of freshly stored coffee grounds in your next brew!
What You’ll Need


Coffee Ground Disposal Tips
Never again will you toss coffee grounds once you’ve seen this
Getting Rid of Coffee Grounds Made Easy
- Place the bin in a convenient location: Find a spot in your kitchen or near your coffee machine where you can easily access the bin. This will make it more convenient for you to dispose of your used coffee grounds
- Use a designated container: Use a separate container to collect your coffee grounds throughout the day. This can be a small jar or a resealable bag. This way, you can easily transfer the coffee grounds to the disposal bin when it’s full
- Empty the bin regularly: Coffee grounds can start to smell if left sitting for too long. Make sure to empty the disposal bin regularly, ideally every day or every few days, depending on your consumption
- Consider composting: Coffee grounds are a great addition to compost. If you have a composting system, you can transfer the coffee grounds from the disposal bin directly into your compost pile or bin. This helps to reduce waste and creates nutrient-rich soil for your plants
- Clean the bin regularly: To prevent any buildup of residue or odors, clean the disposal bin regularly. You can use mild dish soap and warm water to wash it out. Make sure to dry it thoroughly before using it again
- Remember, using a Coffee Grounds Disposal Bin is an eco-friendly way to dispose of your coffee grounds, so enjoy your cup of coffee guilt-free!
