Are you a coffee lover who dreams of creating your own unique signature coffee roast? Look no further! In this step-by-step guide, we will show you how to use a Coffee Bean Roaster Machine to create your very own custom coffee blend. From choosing the right beans to adjusting the roast level, we’ve got you covered. Get ready to embark on a coffee adventure and surprise your taste buds with a delicious cup of your own creation!
Table of Contents
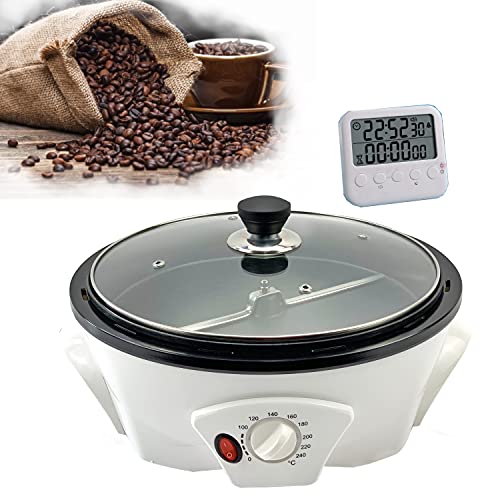
Top-Rated Coffee Roasters for Home Brewing


Choosing the Right Coffee Beans
When it comes to making a delicious cup of coffee, selecting high-quality coffee beans is crucial. Here are some tips to help you choose the right beans for your signature roast:
- Consider the Origin: Different coffee beans come from different regions, each with its own unique flavor profiles. Experiment with beans from different countries to find the taste that suits your preferences.
- Check the Roast Date: Freshness is key when it comes to coffee beans. Look for beans that have been roasted recently, preferably within the past few weeks. This ensures optimal flavor and aroma in your cup of joe.
- Look for Specialty Beans: Specialty coffee beans are grown under specific conditions and have a higher quality compared to mass-market beans. Look for beans with certifications such as Fair Trade, Rainforest Alliance, or Organic to ensure you’re getting the best quality.
- Consider the Roast Level: Coffee beans can be roasted to different levels, from light to dark. Lighter roasts tend to have more acidity and brighter flavors, while darker roasts often have bolder, more robust flavors. Experiment with different roast levels to find the perfect balance for your signature roast.
- Read Reviews and Recommendations: Before purchasing coffee beans, check online reviews and recommendations from other coffee enthusiasts. This can give you valuable insights into the flavor profile, quality, and overall experience of a particular brand or blend.
By following these tips, you can confidently select high-quality coffee beans that will elevate your coffee brewing experience and help you create a perfect cup of coffee every time. Happy brewing!


Preparing the Coffee Roaster Machine
To set up and prepare your coffee bean roaster machine for the roasting process, follow these steps:
- Clean the machine: Start by ensuring that the roaster is clean and free from any debris or residue from previous roasts. This will help maintain the quality of your coffee.
- Adjust the temperature: Depending on the type of beans you are roasting, set the temperature accordingly. Generally, lighter roasts require higher temperatures (around 400°F or 205°C), while darker roasts need lower temperatures (around 350°F or 175°C). Refer to the roasting profile recommended for your specific beans.
- Preheat the roaster: Allow the machine to preheat for a few minutes to ensure even heat distribution and consistent roasting. Preheating helps to bring the beans to the desired temperature more efficiently.
- Load the beans: Fill the roasting chamber with the desired amount of green coffee beans. Be sure not to overload the chamber, as it may affect the roasting process and result in uneven roasts.
- Set the time: Depending on your preferred roast level, set the roasting time. Lighter roasts typically require shorter times (around 8-10 minutes), while darker roasts may need longer (around 12-15 minutes). Adjust the time according to your taste and the recommendations for your beans.
- Start the roasting process: Once everything is set, initiate the roasting process. Monitor the progress closely, observing the color, aroma, and crackling sounds to determine the roast level. Remember to refer to the specific guidelines for your beans to achieve the desired results.
By following these steps, you can effectively set up and prepare your coffee bean roaster machine for a successful roasting process. Enjoy the freshly roasted coffee!
Measuring and Weighing the Coffee Beans
To accurately measure and weigh your coffee beans for consistent results, start by using a digital kitchen scale. Place your empty container on the scale and tare it to zero. Then, add your desired amount of coffee beans to the container. For a medium roast, a general recommendation is to use a ratio of 1:15, which means 1 gram of coffee to 15 grams of water. Adjust the amount of beans based on your personal preference and the strength of flavor you desire. Enjoy your perfectly measured coffee beans for a delicious cup of coffee every time!


Loading the Coffee Beans into the Roaster
To properly load the measured coffee beans into the roaster machine, follow these steps:
- Start by ensuring that the roaster machine is clean and free of any debris or old coffee beans. This will prevent any unwanted flavors or contaminants from affecting the final roast.
- Measure the appropriate amount of coffee beans based on your desired roast size and strength. It’s important to use a scale or measuring cup to ensure accuracy. For example, if you’re aiming for a medium roast, you might measure 200 grams of coffee beans.
- Open the hopper or loading chamber of the roaster machine. This is typically located on the top of the machine or at a designated area. Take care not to force the hopper open, as it may cause damage.
- Gently pour the measured coffee beans into the hopper, making sure not to spill any outside of the designated area. It’s important to avoid overfilling the hopper, as it may lead to uneven roasting or clogging of the machine.
- Once all the coffee beans are in the hopper, securely close the hopper lid or door. Ensure that it’s properly sealed to prevent any beans from falling out during the roasting process.
Remember to always follow the manufacturer’s guidelines and safety precautions when using a roaster machine. This may include wearing protective gloves or using tools for handling hot surfaces. By following these steps, you’ll load the coffee beans into the roaster machine safely and effectively, resulting in a delicious batch of freshly roasted coffee.
Setting the Roasting Parameters
To adjust the temperature, time, and other parameters on your coffee bean roaster machine, start by selecting the appropriate roast level. For a light roast, set the temperature between 350-400°F (175-205°C) and roast for around 8-10 minutes. For a medium roast, increase the temperature to 400-450°F (205-230°C) and roast for 10-12 minutes. And for a dark roast, set the temperature to 450-500°F (230-260°C) and roast for 12-15 minutes. Remember to experiment and make adjustments based on your personal taste preferences.


Monitoring the Roasting Process
To closely monitor the coffee beans during the roasting process, start by observing their color. As the beans roast, they will change from green to yellow, and eventually to a darker brown. Additionally, pay attention to the aroma. The beans will emit a grassy smell at the beginning, followed by a nutty or chocolatey fragrance as they continue to roast. By visually inspecting the color and smelling the aroma, you can gauge the progress of the roasting process and make adjustments accordingly.
Cooling and Removing the Roasted Coffee Beans
To safely cool down and remove the roasted coffee beans from the roaster machine, follow these steps:
- Allow the beans to cool: After the roasting process is complete, leave the coffee beans in the roaster for at least 10 minutes to cool down. This ensures that they reach a safe handling temperature and allows the flavors to develop fully.
- Open the roaster lid: Once the beans have cooled, carefully open the lid of the roaster machine. Use caution as the inside may still be hot.
- Use a heat-resistant scoop: With a heat-resistant scoop, gently transfer the roasted coffee beans from the roaster to a cool, dry container. Avoid using your hands to prevent burns or injury.
- Let them cool completely: It’s crucial to let the coffee beans cool completely before sealing or storing them. This process can take up to an hour, depending on the size of the batch. Be patient and avoid rushing this step to preserve the flavor and quality of the beans.
Remember, allowing the roasted coffee beans to cool completely before handling is vital to avoid burns and maintain their optimal flavor. Enjoy your freshly roasted coffee!
Storing and Resting the Roasted Coffee Beans
To store and allow your roasted coffee beans to rest for optimal flavor development, follow these best practices:
- Wait 12-24 hours: After roasting, let your coffee beans rest for at least 12-24 hours before sealing them. This allows the flavors to fully develop and ensures a more balanced cup of coffee.
- Choose the right packaging: Opt for airtight containers, such as mason jars or resealable bags, to prevent exposure to oxygen and moisture. Avoid using clear containers as they expose the beans to light, which can degrade the flavor.
- Keep it cool and dark: Store your coffee beans in a cool, dark place away from direct sunlight and heat sources. Avoid putting them in the refrigerator or freezer, as they can absorb odors and moisture.
- Avoid frequent exposure: Once you’ve opened the container, try to minimize exposing the beans to air. Take out the desired amount and quickly seal the container to preserve the freshness and aroma.
By following these simple practices, you can ensure that your roasted coffee beans retain their optimal flavor for a longer period, resulting in a more enjoyable and aromatic cup of coffee.
Grinding and Brewing Your Signature Roast
To grind and brew your freshly roasted coffee beans and fully enjoy their unique flavors, start by selecting the appropriate grind size based on your brewing method. For a medium roast, a medium grind is ideal, while a fine grind works best for a light roast. Next, measure the coffee and water ratios according to your desired strength. For a pour-over method, use a 1:16 coffee to water ratio, and for a French press, aim for a 1:15 ratio. Finally, follow the brewing method specific to your chosen technique, such as pouring slowly in a circular motion for pour-over or steeping for a few minutes in a French press. Experiment with different brewing methods to find the one that complements the unique flavors of your signature roast.
Tasting and Adjusting Your Signature Roast
Once you have brewed your signature roast, it’s time to taste and fine-tune it to perfection. Start by taking a small sip and letting the flavors linger on your palate. Pay attention to the different taste elements such as acidity, sweetness, body, and aftertaste. If you feel the need to make adjustments, here are a few tips:
- Evaluating the Flavor Profile: Analyzing the flavor profile is crucial to understanding your coffee better. Consider the balance between acidity and sweetness, the intensity of flavors, and any specific notes that stand out. For example, if your coffee tastes too sour, try adjusting the roast level slightly darker to reduce acidity.
- Making Modifications: If you want to enhance or tweak certain qualities, there are various parameters to consider. For instance, to increase the body of your coffee, try extending the development time during roasting. If you desire more fruity or floral notes, experiment with different origin beans or adjust the roasting temperature.
Remember, don’t be afraid to experiment and trust your taste buds. Making small adjustments can lead to big improvements in your signature roast. Enjoy the process, and soon you’ll have a coffee that perfectly matches your preferences and delights your senses.
The Perfect Cup Awaits
In conclusion, creating your own signature coffee roast with a coffee bean roaster machine is an exciting and rewarding experience. By following the guide, you have learned the importance of selecting high-quality beans, mastering proper roasting techniques, and taking the time to personalize the roast to suit your taste preferences. Remember, experimenting and adjusting the variables will help you refine your skills and create a truly unique and delicious cup of coffee. So, go ahead and unleash your inner coffee connoisseur – the perfect brew awaits!
